If you’re a PC user, you might find yourself wondering, “how to find what GPU I have” at some point. Whether it’s for gaming, graphic design, or just ensuring your machine meets the requirements for software, knowing your graphics card is crucial. A GPU (Graphics Processing Unit) is an essential component that impacts your computer’s performance, especially in graphics-intensive tasks. This comprehensive guide will walk you through various methods to find out what GPU you have installed in your system.
Understanding GPUs and Their Importance
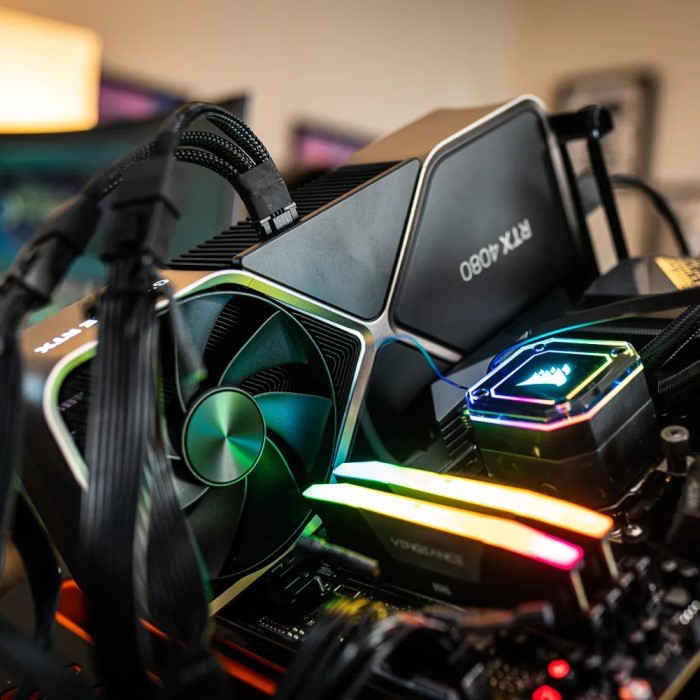
A GPU is often referred to as a graphics card. It is responsible for rendering images, animations, and videos for your computer. Overall, the power of your GPU significantly affects the speed and quality of the visual output.
Why Knowing Your GPU Matters
- Gaming Performance: Gamers need to know whether their GPU can run specific games at desirable settings.
- Software Requirements: Certain design and video editing software require specific GPU capabilities.
- Future Upgrades: If you plan to upgrade your hardware, you need to know your current GPU’s specifications.
Understanding these factors can help you make informed decisions regarding upgrades and optimizations.
Method 1: Checking Your GPU on Windows
Using Device Manager
How to find what gpu i have? One of the simplest methods to find out your graphics card details is using the Device Manager in Windows.
Access Device Manager:
Begin by locating the Windows Start menu, which can be found in the lower-left corner of your screen.
Right-click on the Start menu icon to reveal a context menu with various options.
From this menu, select “Device Manager” to open the Device Manager window, where you can manage hardware devices connected to your computer.
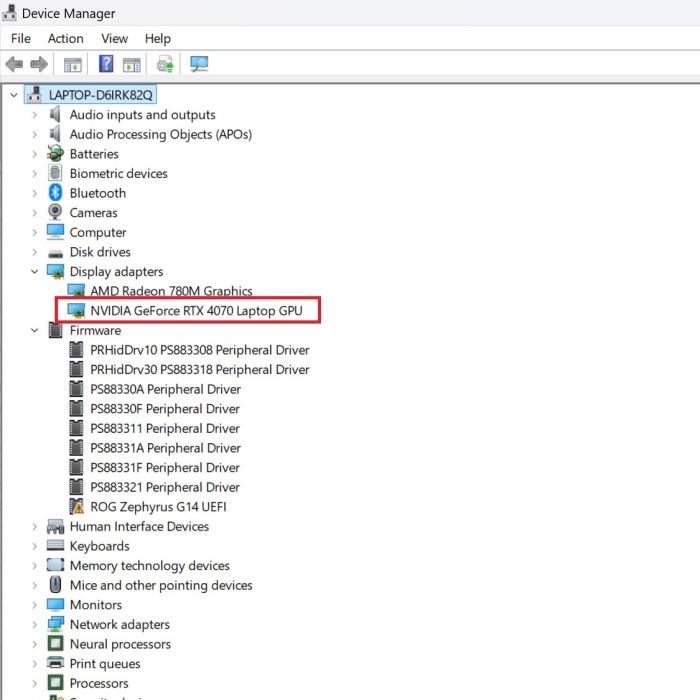
Expand Display Adapters:
In the Device Manager window that appears, you will see a list of hardware categories on your computer.
Look for the category labeled “Display Adapters,” which is specifically related to graphics hardware.
To view the components within this category, click the small arrow (or plus sign) next to “Display Adapters” to expand it and reveal the available graphics devices.
Identify Your GPU:
Once you have expanded the “Display Adapters” section, you will see one or more entries listed under this category, representing the graphics processing units (GPUs) installed on your computer.
The name of your GPU will be displayed clearly; this may include well-known brands like NVIDIA, AMD, or Intel, followed by the specific model number.
If your system has both integrated graphics (built into the CPU) and dedicated graphics (a separate graphics card), both may appear in this section. Be sure to note which name corresponds to each type of GPU.
This method is quick and allows you to see your GPU without needing additional software.
Using DirectX Diagnostic Tool (DxDiag)
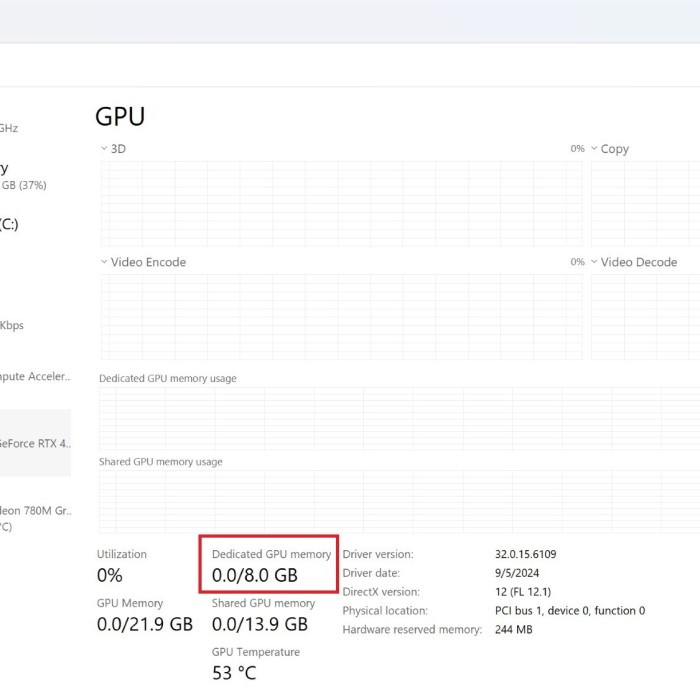
If you want more details about your GPU, the DirectX Diagnostic Tool is the way to go.
- Open Run Command: Press
Windows + Rto open the Run dialog. - Type Dxdiag: Type in
dxdiagand press Enter. - Check Display Tab: After the tool loads, click on the “Display” tab to see information about your GPU, including its manufacturer, device name, and memory.
The DxDiag tool provides in-depth information, which is especially useful if you’re troubleshooting.
Method 2: Checking Your GPU on macOS
Using About This Mac
How to find what gpu i have? If you’re using a Mac, checking your GPU is straightforward.
- Click on Apple Menu: Click the Apple icon in the upper left corner of your screen.
- Select About This Mac: From the drop-down menu, click on “About This Mac.”
- View Graphics Information: In the window that appears, you’ll see an overview of your Mac’s hardware, including the graphics card information. Click on “System Report” for detailed GPU specifications.
This method offers a quick glance at your graphics card and overall system specifications.
Using Activity Monitor
If you want to monitor GPU performance, Activity Monitor will show useful data.
- Open Activity Monitor: Find Activity Monitor by searching via Spotlight (
Cmd + Space). - Go to Window Menu: Click on “Window” in the top menu and select “GPU History.”
- Monitor GPU Usage: Here, you can see real-time data on GPU usage.
Monitoring your GPU can help you understand how much power is being utilized during different activities.
Method 3: Using Third-Party Software
GPU-Z
For an even more in-depth look at your GPU’s specifications, third-party software like GPU-Z is highly recommended.
- Download GPU-Z: Visit the official GPU-Z website and download the program.
- Install and Run: Once downloaded, install GPU-Z and launch it.
- View Detailed GPU Info: GPU-Z will provide extensive details about your graphics card, including memory type, core speed, and more.
This tool is particularly useful for gamers and tech enthusiasts who need detailed specifications for overclocking or monitoring.
Speccy
Another excellent alternative is Speccy, which provides a user-friendly interface showing detailed system information.
- Download Speccy: Install Speccy from the official Piriform website.
- Launch the Software: After installation, open Speccy.
- Find Graphics Card Info: Check the “Graphics” section for all relevant details about your GPU.
Speccy is excellent for users wanting a comprehensive overview of their entire system, including temperature readings.
Method 4: Checking for Integrated Graphics
Understanding Integrated vs. Dedicated Graphics
Many computers come with integrated graphics in addition to a dedicated GPU. Integrated graphics usually share memory with the CPU and are less powerful than dedicated GPUs.
Finding Integrated GPU:
Access Device Manager:
Open the Device Manager on your computer by searching for it in the Start menu. This tool allows you to view all the hardware components installed on your system.
Look for the section labeled “Display Adapters.” This section lists all graphics processing units (GPUs) detected by your system.
Within this section, you should see the integrated graphics, which are often labeled as Intel HD Graphics, AMD Radeon Integrated, or similar, depending on your processor.
Using DxDiag:
Press the Windows key + R to open the Run dialog box, then type “dxdiag” and hit Enter. This will launch the DirectX Diagnostic Tool.
Navigate to the “Display” tab in the DxDiag window. Here, you will find detailed information about both integrated and dedicated graphics cards on your system.
Look for the name and specifications of the integrated GPU, which will usually be displayed alongside dedicated graphics cards if those are present.
Knowing Their Role:
Understanding Integrated Graphics:
Integrated graphics are built into the CPU (central processing unit) and share system memory with the computer. They are designed for everyday computing tasks such as browsing the internet, working with documents, and streaming videos.
These graphics solutions are generally more energy-efficient and produce less heat, making them suitable for laptops and budget desktops where power-saving is essential.
Limitations for Advanced Users:
While integrated graphics can handle basic tasks efficiently, they often fall short when it comes to demanding applications, particularly in gaming and professional environments such as video editing, 3D rendering, and graphic design.
Gamers and professionals typically require dedicated graphics cards, which possess their own memory and processing power, allowing for enhanced performance in resource-intensive applications. These dedicated GPUs offer better frame rates, improved visual effects, and support for higher resolutions, ultimately leading to a more satisfying experience in gaming and productivity tasks.
Benchmarking Performance
To determine whether your PC’s integrated graphics can handle specific applications or games, consider running benchmark tests. Applications like 3DMark or PassMark can help gauge performance.
Method 5: Manufacturer Documentation
Lastly, if you purchased a pre-built system, the manufacturer documentation will have the GPU listed in the specifications.
Locate the System Specs:
Examine the packaging: When you purchase a new computer, the packaging usually contains essential information about the system specifications. Look for a label or card that provides details such as processor type, RAM size, storage capacity, and graphics capabilities.
Review printed documentation: Alongside the packaging, there may be user manuals or quick start guides included in the box. These documents often outline the technical specifications of your computer, making it easier to understand its capabilities and features.
Visit Manufacturer’s Website:
Find your model number: Before heading to the manufacturer’s website, ensure you have your computer’s model number handy. This information is often found on the product label attached to the device or in the printed documentation.
Search for specifications online: Go to the official website of the manufacturer and look for a search bar or a dedicated section for product specifications. Input your model number to access detailed information about your computer’s hardware and features. This may include insights into the processor, RAM, storage options, graphics card, and other relevant specifications that can help you understand your computer’s performance capabilities.
This method provides clear information directly from the manufacturer, ensuring accuracy.

Conclusion
In summary, knowing how to find what GPU I have is essential for optimizing your system’s performance for gaming, content creation, and other graphics-intensive tasks. Whether you’re using built-in tools like Device Manager and DxDiag or third-party applications like GPU-Z, there are multiple methods to ascertain your GPU details quickly and easily.
By following this guide, you will be equipped with the knowledge to identify and understand your GPU, empowering you to make informed decisions about upgrades and performance optimizations.
If you have further questions or need help with anything GPU-related, feel free to revisit this guide or seek additional resources. Enjoy your gaming and computing experience to the fullest with the right information at your disposal!