Introduction: The Importance of Your Graphics Card
Understanding how to check graphics card in pc is essential for anyone who uses a computer, especially gamers and creative professionals. The graphics card, also known as a GPU (graphics processing unit), plays a pivotal role in rendering images, playing videos, and running graphics-intensive applications. Regular checks not only help you diagnose potential issues but also ensure that your system operates at its best. This article covers reliable methods for checking your graphics card, addressing common questions, and enhancing your overall computing experience.

Why You Should Check Your Graphics Card
- Monitor Performance: Regularly checking your graphics card allows you to monitor its performance. This is crucial for both gamers and professionals working with graphic design or video editing software.
- Diagnose Problems: If you experience graphical glitches, crashes, or low frame rates, knowing how to check your graphics card can help identify the source of the issue quickly.
- Driver Management: Keeping your graphics drivers updated is vital for performance. Knowing how to check your GPU assists in determining if you need to install updates.
- Upgrade Decisions: If you consider upgrading to a new graphics card, understanding your current one’s specs is essential for making informed decisions.
How to Check Graphics Card in PC: Step-by-Step
Method 1: Using Windows Device Manager
Open Device Manager
- Access Options: How to check graphics card in pc? To open Device Manager, you can either right-click on the Start menu icon located in the lower-left corner of your screen or simply press the Windows key + X simultaneously.
- Select Device Manager: A pop-up menu will appear. From this list, select “Device Manager” to launch the window that allows you to manage all hardware devices connected to your computer.
Locate Display Adapters
- Find the Right Section: Within the Device Manager window, scroll through the list of device categories and locate the section labeled “Display adapters.”
- Expand the List: Click on the small arrow (or plus sign) next to “Display adapters” to expand this section. This action reveals all graphics devices connected to your system.
Identify Your GPU
- View Graphics Cards: Once expanded, you will see the name (and potentially multiple names) of the graphics card(s) installed in your system. This could include integrated graphics as well as dedicated GPUs.
- Take Note: Carefully note down the name and model number of your graphics card. This information is useful for troubleshooting, driver updates, or when seeking technical support.
View Properties
- Access Properties Window: To gather more detailed information about your graphics card, right-click on the name of your graphics card and select “Properties” from the context menu that appears.
- Essential Details: The Properties window will open, providing you with important information, including:
- Driver Information: Details about the driver currently installed for your graphics card, including its version and update status.
- Device Status: Information regarding whether the device is functioning properly or if there are any issues detected.
- Use for Troubleshooting: This data can help you diagnose any potential problems with your graphics hardware or ensure that you have the latest driver installed.
Method 2: Using DirectX Diagnostic Tool (DXDIAG)
Launch the Run Command
- Open the Run Dialog: To begin, press the Windows key and the R key at the same time. This action will instantly open the Run dialog box on your screen.
- Quick Access Feature: The Run command is a quick access feature in Windows that allows you to execute programs or tools by typing their names directly.
Input DXDIAG
- Type Command: In the Run dialog box, carefully type dxdiag. Make sure to spell it correctly to ensure accurate results.
- Execute the Command: After entering the command, press the Enter key or click OK. This action will launch the DirectX Diagnostic Tool, which is an essential tool for diagnosing issues related to DirectX and graphics.
Access Display Information
- Navigate to the Display Tab: Once the DirectX Diagnostic Tool has fully loaded, look for the “Display” tab at the top of the window and click on it.
- View Vital Details: In this section, you will find crucial information about your graphics hardware, including:
- GPU Name: The specific name of your graphics processing unit, which helps identify its capabilities.
- Manufacturer: Information about the company that produced the graphics card, offering insight into its reliability and support.
- Memory Details: The amount of video memory available on the GPU, which can impact performance in graphics-intensive applications.
Document the Information
- Saving the Data: If you wish to keep this information for future reference, look for the “Save All Information” button on the tool’s interface and click on it.
- Create a Text File: This action will prompt you to choose a location to save a text file that contains all the diagnostic information collected by the tool.
- Review Later: The saved file can be opened and reviewed at any time, making it useful for troubleshooting, system upgrades, or sharing details with technical support.
Method 3: Using Third-Party Software
- Download GPU-Z or MSI Afterburner: Both tools offer detailed insights into your graphics card. Download one from the official website.
- Install and Open the Tool: Install the software on your computer. When you launch GPU-Z or MSI Afterburner, you will access a wealth of information about your GPU, including clock speeds, memory usage, and temperature.
- Real-Time Monitoring: These tools allow you to monitor your graphics card’s performance in real-time. This functionality helps you track how well your GPU performs under load.
Diagnosing Common Graphics Card Issues
- Screen Artifacts: If you see unusual lines, texture glitches, or color distortions on your screen, it may indicate overheating or hardware failure. Checking the temperature of your GPU can help determine if cooling solutions are adequate.
- Low Performance: If games or applications run poorly, inspect your GPU’s utilization percentage. If the GPU is maxing out while other components stay idle, it might be time for an upgrade.
- Driver Malfunctions: Graphics drivers occasionally become outdated or corrupted. This issue may lead to crashes or poor performance in applications. Always keep your drivers up to date using tools like GeForce Experience or AMD Radeon Software.
- Compatibility Issues: Incompatibility between new games or software and older graphics cards can also cause performance issues. Verify if your GPU meets the minimum requirements for the software you are trying to run.
Frequently Asked Questions (FAQs)
How can I check my computer’s graphics card?
You can check your computer’s graphics card using Device Manager, DirectX Diagnostic Tool (DXDIAG), or third-party software like GPU-Z. Each method provides details about your GPU’s name and specifications.
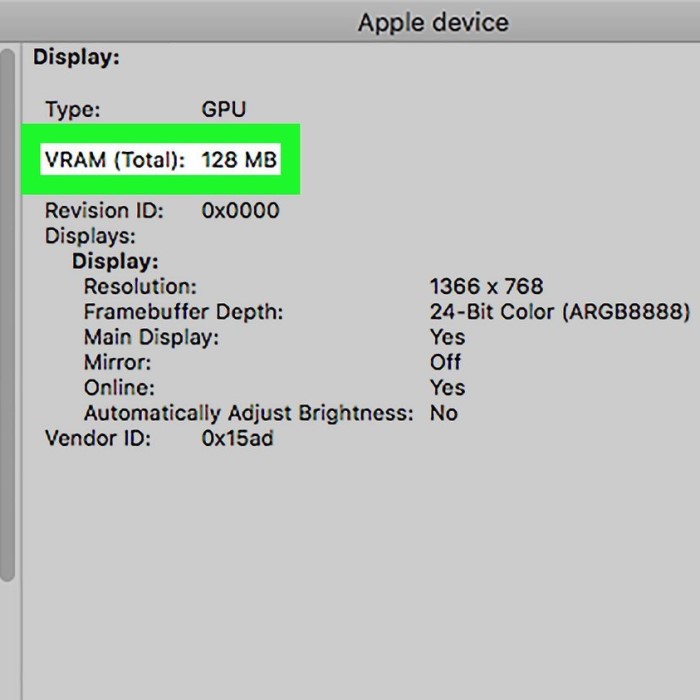
How do I know how many GB my graphics card is?
To determine how many GB your graphics card has, use the DXDIAG tool or GPU-Z. In these applications, you’ll find the memory size listed directly, allowing you to assess the GPU’s capabilities easily.
How to check PC graphics settings?
Check your PC graphics settings by right-clicking on your desktop and selecting “Display settings” or “Graphics properties,” depending on your graphics card. This option provides access to resolution, refresh rates, and graphic quality settings.
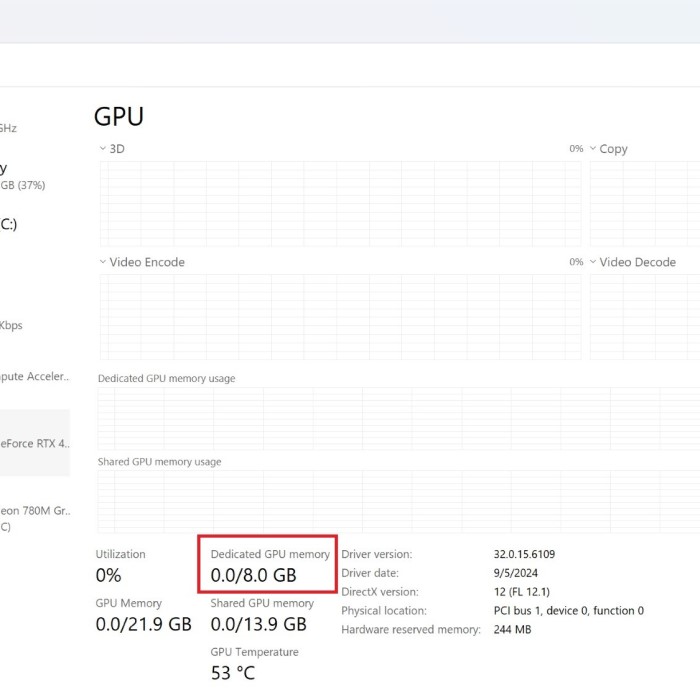
How do I check my CPU and GPU specs?
To check your CPU and GPU specifications, use the Task Manager. Press Ctrl + Shift + Esc to open Task Manager, then go to the “Performance” tab. Here you will find detailed information about both your CPU and GPU.
Enhancing Graphics Performance
- Keep Your Drivers Updated: Always ensure that your graphics drivers are current. Regular updates help maintain performance and compatibility with the latest games and software.
- Monitor Temperatures: Effective cooling systems are vital for performance. Use monitoring software to ensure your GPU operates within safe temperature ranges. Overheating can lead to throttling and decreased performance.
- Adjust Graphics Settings: Reducing graphics settings in demanding games or applications can improve performance. Consider lowering shadows, texture details, and resolution to achieve better frame rates.
- Consider Upgrading: If your graphics card cannot handle your gaming needs or the software you use, evaluate options for upgrading. Research modern GPUs that provide better performance for your requirements.
Conclusion: Mastering Your Graphics Card
In conclusion, knowing how to check graphics card in pc is crucial for maintaining optimal performance and diagnosing potential issues. By using tools like Windows Device Manager, DXDIAG, or third-party software, you can easily uncover essential details about your GPU. Additionally, addressing common issues such as driver updates and overheating will ensure your graphics card runs smoothly. Stay proactive in monitoring and maintaining your GPU to enjoy a superior computing experience, whether for gaming or professional applications. You now have the knowledge to effectively manage your graphics card and keep your system running at its best!