Introduction
The Xbox One is a powerful gaming console that has brought joy to countless gamers around the world. However, it is not immune to common hardware issues that may arise over time. One of the most concerning issues is a malfunctioning HDMI port. A faulty HDMI port can lead to various problems, such as no display on your screen, flickering images, or intermittent sound issues, which can severely disrupt your gaming experience. If you find yourself facing these problems, you may need to consider an Xbox One HDMI port replacement.
This comprehensive guide will walk you through the process of replacing the HDMI port on your Xbox One. From identifying the symptoms of a failing port to gathering the necessary tools and performing the replacement step-by-step, this guide covers everything you need to know. Even if you are not particularly tech-savvy, with some basic tools and our easy-to-follow instructions, you can tackle this repair confidently and effectively.
Why You Might Need an HDMI Port Replacement
Common Symptoms of a Faulty HDMI Port
Before diving into the replacement process, it’s important to understand the signs that indicate a failure in your xbox one hdmi port replacement. Some common symptoms include:
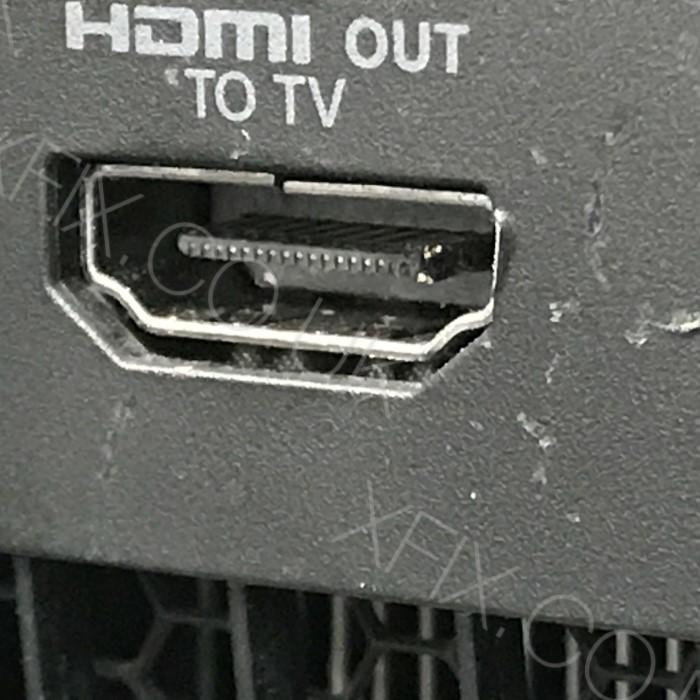
- No Display on TV: The most obvious sign of a faulty HDMI port is when your screen remains black despite having everything powered on. If you’ve checked your cable connections and switched inputs with no success, the port might be the culprit.
- Intermittent Connectivity: If the screen flickers or sometimes goes blank when the Xbox is on, this could indicate a loose connection within the HDMI port itself.
- Audio Issues: Sometimes, audio may wean in and out or stop altogether. Poor HDMI connections can cause this type of issue as well.
- Physical Damage: Inspect the HDMI port for visible signs of wear, such as bent pins, cracks, or debris lodged inside. These physical indications often signal that replacement is necessary.
Recognizing these symptoms early can save you time and frustration, allowing you to remedy the issue before it potentially worsens.
Tools and Materials Required for the Replacement
Essential Tools for HDMI Port Replacement
Before you begin replacing your Xbox One’s HDMI port, ensure you have all the necessary tools at your disposal:
- Screwdrivers: You will need a set of precision screwdrivers. Typically, a Torx screwdriver (often T8 or T9) will help you remove the required screws on the console, alongside a standard Phillips screwdriver for other screws.
- Small Flathead Screwdriver: This can be very useful for prying open the case without causing damage to the console.
- Soldering Kit: If the HDMI port is soldered to the motherboard, a soldering iron will be essential for removing the old port and attaching the new one. This requires some understanding of soldering techniques.
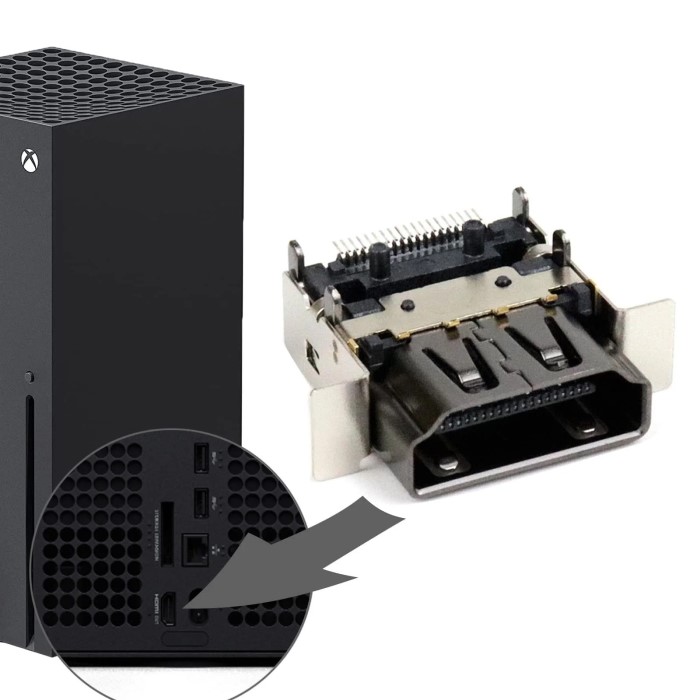
- Replacement HDMI Port: Ensure you purchase a compatible HDMI port designed specifically for the Xbox One. Use trusted retailers or verified online sources to get the right component.
- Anti-Static Wrist Strap: To prevent electrostatic discharge (ESD) from damaging sensitive electronic components, it’s wise to use an anti-static wrist strap during the entire process.
- Hot Glue Gun: While not always necessary, a hot glue gun can be useful for securing connections, especially if you are making non-solder connections.
- Foam or Cardboard: This is not an absolute requirement but can be handy for protecting your working surface and organizing small screws and components.
Having these tools and materials ready will make the replacement process easier and less stressful.
Step-by-Step Guide to Replacing the HDMI Port
1. Preparing Your Workspace
Before you start dismantling your Xbox One, it’s crucial to set up a dedicated workspace:
- Clear Surface: Use a table or desk that provides ample space to work. Make sure it is free from dust, clutter, and anything that could potentially interfere with your repair process.
- Good Lighting: Ensure that your workspace is well-lit. Proper lighting will help you see small parts and connections more clearly, reducing the risk of mistakes.
- Organize Tools: Arrange your tools within arm’s reach. Keeping everything organized will reduce distractions and allow you to work efficiently.
2. Powering Off the Console
Ensure that the Xbox One is completely powered off before you start any repair:
- Unplug from Power: Disconnect the power cable from the console and unplug it from the outlet. This step is crucial to avoid any electrical hazards.
- Remove External Connections: Disconnect any cables, including the HDMI cable, controllers, and any other peripherals connected to the Xbox One.
3. Opening the Xbox One
Now that your workspace is prepared, you can safely open your Xbox One:
- Removing Screws: Use the Torx screwdriver to remove the screws located on the back and side of the console. Keep these screws organized by placing them in a small container or on a magnetic pad.
- Prying Open the Casing: Once the screws are out, take your flathead screwdriver or spudger and carefully pry the outer casing of the console apart. Make sure to work your way around the edges to avoid damaging the casing or internal components.
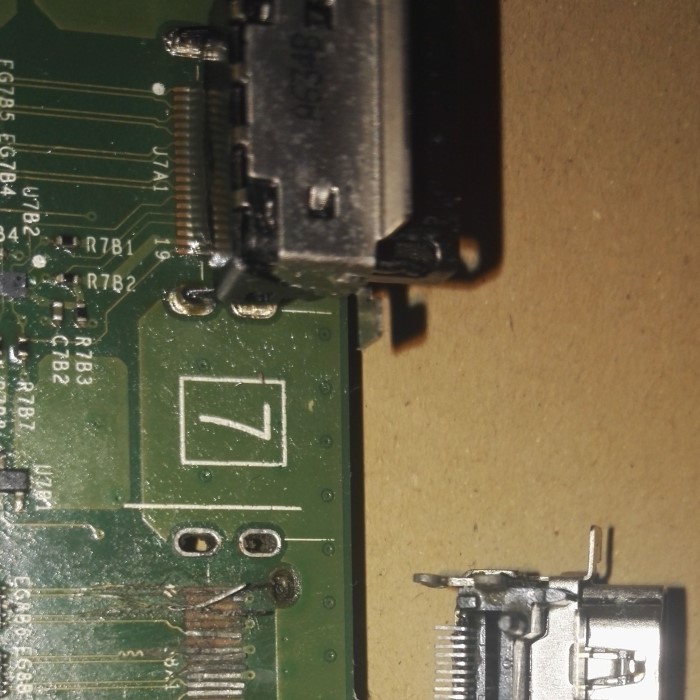
4. Locating and Detaching the HDMI Port
With the console’s casing removed, you can access the internal components:
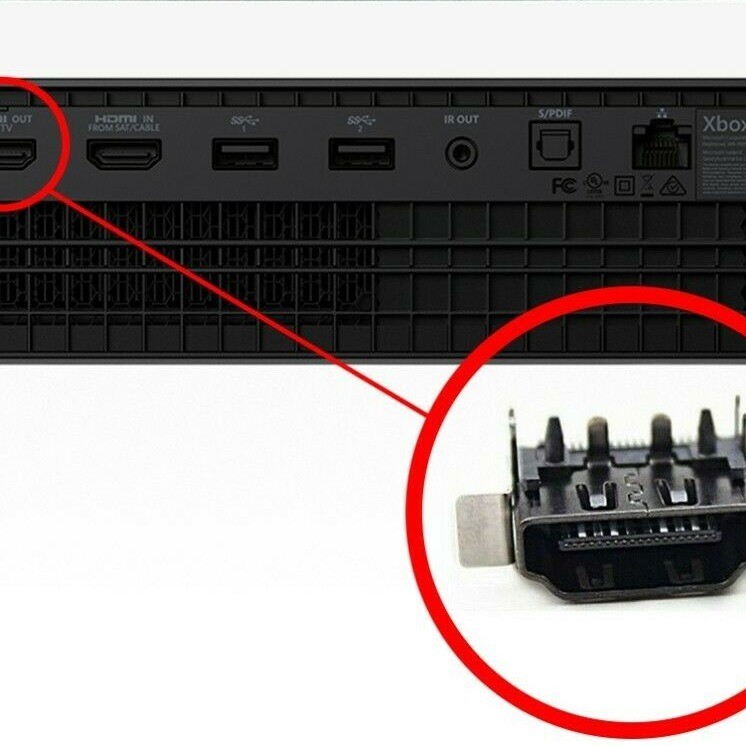
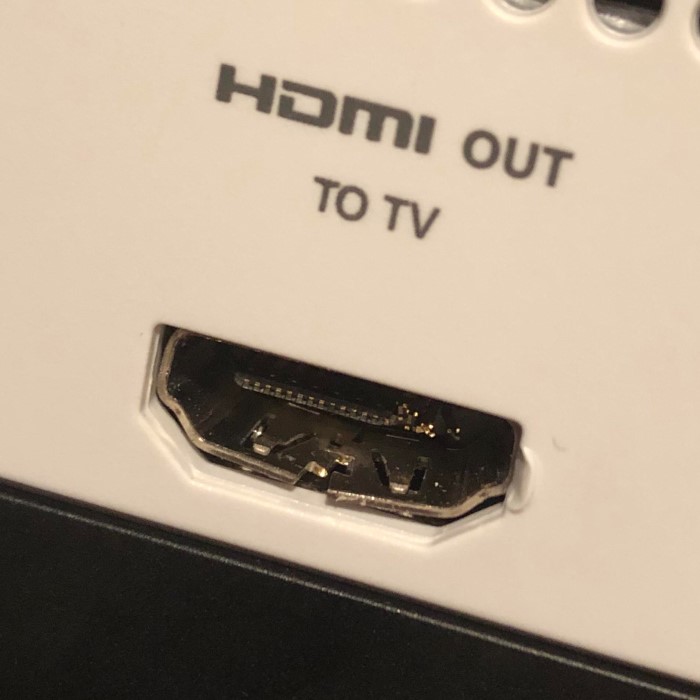
- Identify the HDMI Port: Locate the HDMI port on the motherboard of the Xbox One. You will see it connected with several tiny pins.
- Disconnecting Wires: If there are any wires connected to the HDMI port, carefully disconnect them. Note the arrangement, as you will need to reconnect them later.
- Removing the Old Port: If the HDMI port is soldered, heat your soldering iron and carefully melt the solder at each connection to detach the port. If it’s simply secured, gently pull it away from the motherboard.
5. Installing the New HDMI Port
Now that the old HDMI port is removed, it’s time to install the new one:
- Position the New Port: Place the new HDMI port into the designated area on the motherboard, ensuring it lines up with the solder points.
- Soldering the Connections: Apply solder to each point to secure the new port. Make sure the connections are strong and stable. If you are not comfortable soldering, consider asking someone experienced in electronics to assist.
6. Reassembling the Xbox One
With the new HDMI port installed, it’s time to put the console back together:
- Replacing the Casing: Align the outer casing carefully over the console and press it back in place.
- Reinstalling Screws: Replace all screws, ensuring that they fit snugly but without over-tightening, which could damage the casing.
- Final Inspection: Take a moment to visually inspect the internals and the HDMI port installation. Ensure everything looks clean and properly connected before powering it back up.
Testing Your Xbox One
1. Powering Up for the First Time
With your Xbox One reassembled, you can now power it back up:
- Reconnect All Cables: Plug the power cord back into the Xbox One and connect the HDMI cable to the new port and your TV.
- Turn On the Console: Hit the power button and watch for the startup screen. This screen indicates that your console is functioning properly.
2. Testing Video and Audio Output
Once the console is on, make sure to conduct some tests:
- Video Output Check: Ensure the display is clear and stable. Confirm that you have your correct input selected on your TV.
- Audio Test: Play a game or video to test the audio output. Make sure sound quality is clear, and there are no disruptions or distortions.
 Troubleshooting Common Issues
If you power on your xbox one hdmi port replacement and still face display or audio issues, consider the following:
- Cable Examination: Check the HDMI cable for any damage and ensure that it is firmly connected on both ends.
- Port Inspection: Double-check that the new HDMI port is properly soldered and connected.
- Additional Support: If problems persist, you may want to consult a professional repair service for further assistance.
Frequently Asked Questions (FAQ)
Can you replace the HDMI port on an Xbox?
Yes, replacing the HDMI port on an Xbox One is entirely feasible with the right tools and patience. This DIY repair can save you from costly service center bills while giving you hands-on experience.
Can I use my Xbox without an HDMI port?
No, an Xbox console cannot operate without a functioning HDMI port for video and audio output. The HDMI connection is essential for displaying content on a screen.
Is replacing an HDMI port hard?
The difficulty of replacing an HDMI port depends on your soldering skills and comfort with electronics. While it may pose a challenge to some, following the proper steps can make it manageable.
Do Xbox HDMI ports go bad?
Yes, HDMI ports can wear out over time due to frequent use, especially with repeated plugging and unplugging. Damage can also occur from physical impacts, leading to the need for replacement.
Conclusion: Successfully Replacing Your Xbox One HDMI Port
In conclusion, performing an Xbox One HDMI port replacement can breathe new life into your console, allowing for continued gaming enjoyment. By identifying the symptoms of a failing port, gathering the necessary tools, and following the steps outlined above, you can complete this repair successfully.
This process not only empowers you to solve common gaming issues but also enhances your technical skills along the way. Remember to take your time, ensure that you follow the instructions carefully, and enjoy the satisfaction of having repaired your very own gaming console.
Take your Xbox One back to gaming glory, and enjoy all your favorite titles once again without any interruptions! Happy gaming!