Introduction
Pairing wireless earbuds together can seem like a daunting task for some, but it’s actually a straightforward process once you know the ropes. Whether you’re setting up your new Sony WF-1000XM4s, Apple AirPods Pro, or any other brand of true wireless earbuds, this guide will walk you through every step from unboxing to enjoying seamless stereo sound. The pairing process not only allows you to connect your earbuds with each other, but also to your smartphone, tablet, or laptop for an immersive audio experience. Let’s dive into the world of wireless connectivity!
Step 1: Preparation and Charging
Before diving into the pairing process, it’s essential to prepare your wireless earbuds for their first connection. This starts with ensuring they have enough battery life to complete the setup.
1.1 Unboxing and Inspection
Begin by carefully unboxing your new wireless earbuds. Take out all components including the earbuds, charging case, any included accessories such as extra ear tips or wings, and a charging cable if provided separately. Inspect each piece for any defects or damage before proceeding.
1.2 Familiarize with Charging Case
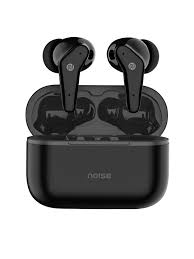
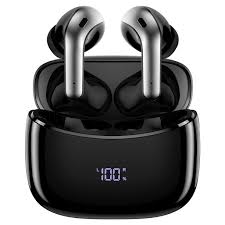
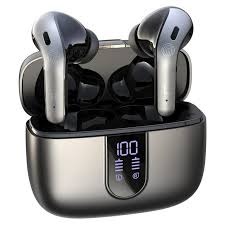
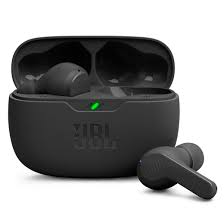
The charging case is your earbuds’ power hub. Most cases have an LED indicator that shows the charge level of both the case and the earbuds when placed inside. Learn how to open and close the case securely and identify where the earbuds should sit for charging. Some cases use USB-C or Lightning cables while others support wireless charging.
1.3 Charging the Earbuds
Insert the earbuds into their designated slots in the charging case and close the lid. Plug in the charging cable to the case and to a power source. The LED indicators will usually light up, showing the charging status. Ensure both earbuds are charged fully, which can take from 1-2 hours depending on the model. It’s crucial not to attempt pairing while the buds are low on power, as this could disrupt the process or cause connectivity issues later.
1.4 Battery Life Indicators
Stay attentive to the charging indicators. When the LEDs turn solid green or blue (depending on the brand), this typically signals that the earbuds are fully charged and ready for pairing. For models with companion apps, you can also check the battery levels through the app once they’re connected.
In summary, proper preparation involves unpacking your earbuds, understanding how to use the charging case, and ensuring both earbuds have a full charge before attempting to pair them. A well-charged set of earbuds ensures a smooth pairing experience and minimizes potential hiccups along the way.
Step 2: Taking Out of the Case
True wireless earbuds are often designed to automatically enter pairing mode when removed from their charging case. Open the lid and take out both earbuds simultaneously. They should start flashing an LED light, which indicates they’re ready to pair. Note that some models require holding down a specific button on one or both earbuds to initiate pairing mode.
Step 3: Enabling Bluetooth on Your Device
On your device (smartphone, tablet, etc.), go to Settings, then find and activate Bluetooth. Ensure your device is set to “Visible” or “Discoverable” so that the earbuds can locate it. This option is usually located within the Bluetooth settings menu.
Step 4: Connecting to Your Device
Scan for available devices on your Bluetooth settings page. You should see your earbuds listed; they may appear under their model name or a generic Bluetooth headset identifier. Tap on the earbuds’ name to begin pairing. If prompted for a passcode, the default is usually ‘0000’ or ‘1234’, though some earbuds don’t require a code.
Step 5: Confirming Connection and Stereo Sound
Once paired, your earbuds should connect automatically whenever they’re taken out of their case and your device’s Bluetooth is on. Test the connection by playing audio – you should hear sound from both earbuds, indicating stereo pairing has been successful. If you only hear sound in one bud, check the audio settings on your device to ensure it’s not sending audio to just one channel.
Step 6: Customizing Controls and Features
Most wireless earbuds come with companion apps that allow for further customization such as touch control settings, noise cancellation adjustments, and firmware updates. Download and install the app recommended by your earbud’s manufacturer (like Sony | Headphones Connect or the Apple “Find My” app). Use the app to fine-tune your earbuds’ features and ensure they’re functioning optimally.
Step 7: Troubleshooting Pairing Issues
If you encounter difficulties during the pairing process of your wireless earbuds, here are some common troubleshooting steps to help resolve these issues:
1. Resetting the Earbuds
Many wireless earbuds have a factory reset function that can resolve connectivity problems. This typically involves placing the buds in pairing mode for an extended period or using a specific combination of button presses. Check your user manual for precise instructions on how to perform a reset. After resetting, try pairing them again with your device.
2. Restart Your Device
Sometimes, the issue might lie with your phone or tablet rather than the earbuds. Power off and then restart your device, and attempt pairing once more after it’s fully rebooted.
3. Remove Previous Pairings
Ensure that any previous pairings of the earbuds are removed from your device’s Bluetooth settings. Forgetting or unpairing the earbuds clears any existing connections which could interfere with establishing a new one.
4. Update Firmware
Check if there is a firmware update available for both your earbuds and your device. Sometimes, outdated software can cause pairing issues. Updates often contain bug fixes and performance enhancements that may resolve connection problems.
5. Close Proximity
Keep your earbuds and the device close together during the pairing process. Bluetooth signals have a limited range, so distance can be a factor if you’re experiencing difficulty pairing.
6. Check Battery Levels
Low battery levels in either your earbuds or your device can sometimes disrupt pairing. Ensure both have enough charge before attempting to connect.
7. Use Companion App
Some earbuds come with companion apps that provide additional tools for troubleshooting and managing the pairing process. Check the app for diagnostic tools, pairing instructions, or options to manually reconnect.
8. Contact Support
If all else fails, consult the manufacturer’s support website or contact their customer service team for further assistance. They will have detailed knowledge about potential bugs or known issues and can guide you through more advanced troubleshooting steps.
Remember, patience is key when troubleshooting. Follow each step carefully, and don’t hesitate to reach out for professional help if needed.
Conclusion
Pairing wireless earbuds isn’t just about connecting two pieces of hardware; it’s about unlocking the potential of a truly wireless lifestyle. With patience and these detailed steps, you’ll be able to enjoy crisp, clear stereo sound without the hassle of wires. Always remember, technology sometimes needs a little extra attention, but armed with the right knowledge, you’ll have your earbuds synced up and ready to soundtrack your day in no time. Enjoy the freedom and versatility of your newly paired wireless earbuds!