Introduction
Wireless earbuds have revolutionized the way we listen to music, take calls, and immerse ourselves in audio content. True wireless earbuds offer a level of convenience and freedom that traditional wired headphones can’t match, but pairing them for the first time or with a new device might seem daunting if you’re unfamiliar with the process. This comprehensive guide aims to simplify that experience, taking you through every step from unboxing to enjoying your favorite tunes.

1.Unboxing Your True Wireless Earbuds: The First Impression
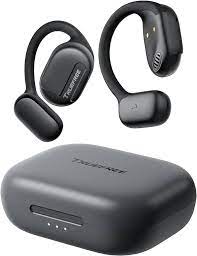
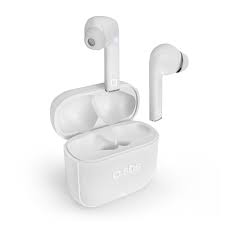
When you first unbox your true wireless earbuds, you’ll typically find them nestled inside a charging case along with additional accessories like extra ear tips in various sizes for a comfortable fit, a USB charging cable (or a wireless charging pad if included), and a user manual. Carefully remove all items from the packaging, taking care not to damage any of the components.
Inspecting the Charging Case and Earbuds
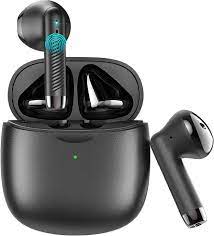
Examine the charging case and earbuds for any visible defects or signs of wear. The charging case usually features an LED indicator that shows battery levels. It’s important to ensure that the earbuds fit securely into their designated slots within the case. Some cases may also have magnets to help guide and secure the buds in place during charging.
Charging the Charging Case
Before using or pairing your earbuds, it is essential to charge both the earbuds and the charging case fully. Plug the provided USB cable into a power source such as a wall adapter or a computer’s USB port, then connect it to the charging case. If your earbuds support wireless charging, place the case on a Qi-certified wireless charger.
Charging the Earbuds
Place the earbuds into the charging case. Most models automatically start charging when inserted, often signified by an LED light on each bud or on the case turning red (or another color specified in the manual) and changing to green or turning off when fully charged. Note that charging times can vary, but generally, it takes around 1-2 hours to fully charge most earbuds.
Battery Life Indicators
Keep an eye on the LED indicators while charging. They provide valuable information about the battery status. A blinking light might mean they’re still charging, whereas a solid light usually signifies a full charge. Always refer to your user manual for specific instructions and battery life estimates for both the earbuds and the charging case.
Preparing for Initial Use
Once your earbuds are fully charged, they’re ready for their initial setup and pairing process. Ensure they are removed from the case before attempting to pair them to your device, as some models enter pairing mode automatically upon removal from the case.
Remember, proper charging habits can extend the lifespan of your earbuds and ensure they’re always ready to use when needed. By following these steps, you set the foundation for seamless audio experiences with your new true wireless earbuds.
2.Initial Pairing Mode
To pair your earbuds for the first time, they must be in pairing mode. Typically, this involves:
- Removing the earbuds from the case. For many models, this automatically puts them in pairing mode, often signified by a flashing LED light.
- For others, press and hold the multifunction button on each bud until you see an indication (usually a blinking light) that pairing is active.
Refer to your user manual for specific instructions as different brands/models may have slightly different procedures.
3.Pairing with Your Device
On your smartphone, tablet, or other Bluetooth-enabled devices:
- Navigate to “Settings” and then to “Bluetooth.”
- Enable Bluetooth and ensure it’s searching for nearby devices.
- The name of your earbuds should appear in the list of available devices. Tap on it to initiate pairing.
- If prompted for a passcode or confirmation, accept it or follow the on-screen instructions.
Some devices may also have a quick pairing feature that allows direct connection to compatible earbuds with minimal steps.
4.Connecting Both Earbuds
True wireless earbuds usually connect independently to the source device, meaning you’ll see two separate entries for the left and right earbud. Once you’ve paired the first bud, the second one should automatically sync. If not, follow any additional instructions in the manual to manually pair the second earbud. It’s crucial that both earbuds are connected to enjoy stereo sound.
5.Customizing Controls and Settings
Many true wireless earbuds allow customization of touch controls or settings via a companion app. Download and install the manufacturer’s app (e.g., Bose Music, Jabra Sound+, etc.), and follow the prompts to link your earbuds to the app. Here, you can adjust equalizer settings, control playback options, set up voice assistants, and customize the function of touch gestures.
6.Updating Firmware
Stay updated with the latest firmware to optimize performance and fix any bugs. The companion app will often notify you of available updates. Follow the update instructions within the app, ensuring both earbuds are securely in their charging case and adequately charged during the process.
7.Maintaining Connection and Troubleshooting
-
Initial Pairing and Connection:
- To pair your earbuds for the first time, turn on Bluetooth on your device (phone, tablet, laptop), then take the earbuds out of their charging case. They should automatically enter pairing mode, often signified by a flashing LED light or voice prompt. On your device, select your earbuds from the list of available Bluetooth devices to establish a connection.
-
Maintaining Stable Connection:
- Once paired, your earbuds should connect automatically when removed from the case and turned on. If you experience disconnections, ensure that your device’s Bluetooth is active and within range (usually around 30 feet or 10 meters). Also, avoid obstructions like walls and electronic interference from other wireless devices.
-
Connection Issues Resolution:
- If one or both earbuds disconnect frequently, try resetting them by following the instructions in the user manual (usually involves placing them back in the case and holding down a button). You can also forget the earbuds from your device’s Bluetooth settings and re-pair them.
-
Audio Sync Issues:
- If audio seems out of sync, ensure both earbuds are properly seated in your ears and have a secure fit. If the issue persists, try reconnecting or restarting both your earbuds and the connected device.
-
Battery Drain and Connectivity:
- Low battery levels in either the earbuds or the charging case can lead to connectivity issues. Always keep them adequately charged. If an earbud consistently loses connection when the battery is low, it might need a firmware update or service check.
-
Firmware Updates:
- Regularly check for firmware updates for your earbuds through the manufacturer’s app (if applicable). These updates often include bug fixes and enhancements that can improve connectivity and performance.
-
Troubleshooting Steps:
- If all else fails, consult the troubleshooting section in your product manual or reach out to the customer support team for specific guidance based on your earbuds model and symptoms.
Remember, each brand and model may have unique features and troubleshooting steps, so always refer to the provided documentation for the most accurate information.
Conclusion
Pairing true wireless earbuds is a straightforward process that gets easier with practice. By following these steps, you’ll soon be able to enjoy seamless connectivity and high-quality audio without wires. Remember, patience is key when troubleshooting, and always refer to the manufacturer’s support resources if you encounter difficulties. Now that you’ve mastered pairing, it’s time to immerse yourself in the world of truly untethered audio experiences!