Introduction
Connecting Sony wireless earbuds to your devices is a breeze once you understand the process. Whether you’re an audiophile, fitness enthusiast, or simply someone who appreciates hands-free convenience, Sony’s range of wireless earbuds offers cutting-edge audio quality and seamless connectivity. This comprehensive guide will walk you through seven simple steps for pairing your Sony wireless earbuds with various devices, ensuring you get the most out of your listening experience.
Step 1: Preparation
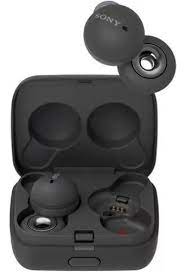
Before diving into the pairing process, ensure that your Sony wireless earbuds are fully charged and ready to use. The charging case typically has LED indicators to show battery status. Also, make sure your device – whether it’s a smartphone, tablet, laptop, or even a smart TV – has Bluetooth enabled and its operating system is up-to-date.
Step 2: Power On and Pairing Mode
To connect your Sony wireless earbuds, follow these general instructions:
- Take the earbuds out of the charging case; they should automatically power on.
- For initial setup or new connections, press and hold the ‘Power’ or ‘Pairing’ button until the indicator blinks rapidly. This indicates that the earbuds are in pairing mode.
- If your model supports touch controls, check the manual for specific gestures to enter pairing mode.
Step 3: Connecting to a Smartphone
On your smartphone:
- Go to Settings > Bluetooth and turn it on.
- Your Sony wireless earbuds should appear in the list of available devices. Tap on the name of your earbuds to initiate pairing.
- If prompted, enter any passcode displayed on your phone screen. The default for Sony earbuds is usually “0000” or “1234.”
- Once connected, your earbuds will be listed as ‘Connected’ under Bluetooth settings.

Step 4: Connecting to a Laptop or Computer
The process for laptops and computers varies slightly depending on the OS:
- Windows: Click the Action Center, enable Bluetooth, then navigate to Settings > Devices > Bluetooth & other devices. Add a new device and select your earbuds from the list.
- MacOS: Open System Preferences > Bluetooth, ensure it’s turned on, and click “Connect” next to your earbuds when they appear.
Step 5: Connecting to a Smart TV
Many modern TVs support Bluetooth connectivity:
- Access your TV’s settings menu and locate the Bluetooth section.
- Put your earbuds in pairing mode and wait for them to appear in the TV’s list of discoverable devices.
- Select your earbuds and confirm the connection.
Step 6: Troubleshooting Connection Issues
If you encounter any issues while connecting or maintaining a connection between your Sony wireless earbuds and your device, here’s a step-by-step guide to troubleshooting:
Reboot Devices:
The first basic solution is often the most effective. Turn off both your earbuds and the paired device, then restart them. This can reset any temporary software glitches that might be causing connectivity issues.
Reset Earbuds:
If pairing fails, try resetting the earbuds to their factory settings. Consult the user manual for specific instructions on how to do this, as it usually involves holding down a button combination until an LED indicator blinks rapidly.
Check Bluetooth Settings:
Ensure that Bluetooth is enabled on your device and the device is set to “Visible” or “Discoverable”. Remove your earbuds from the list of paired devices in your Bluetooth settings, then attempt to pair them again.
Update Firmware:
Use the Sony | Headphones Connect app to check for firmware updates for your earbuds. Outdated firmware could cause connectivity problems. Follow the app’s prompts to install any available updates.
Clear Cache:
On some devices, clearing the Bluetooth cache can help resolve pairing issues. Go to your device’s settings menu, find ‘Apps’ or ‘Application Manager’, locate Bluetooth, and clear its cache data.
Proximity and Interference:
Wireless signals can be disrupted by distance or interference. Make sure your device and earbuds are within the recommended range (usually around 30 feet) and away from other electronic devices or sources of wireless interference.
Multiple Device Issue:
If you’ve been using the earbuds with multiple devices, they may be trying to connect to another nearby device instead. Disconnect the earbuds from all other devices before reconnecting to your preferred one.
Contact Support:
If none of the above steps resolves the issue, reach out to Sony’s customer support. They can provide detailed guidance tailored to your specific model and situation, including potential hardware issues.
Remember, patience is key when troubleshooting technology. Follow each step carefully and methodically, and if one doesn’t work, don’t hesitate to move on to the next. Persistent connection problems might indicate a hardware fault that requires professional attention.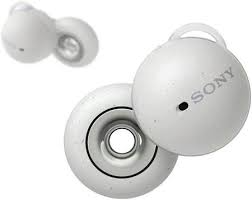
Step 7: Advanced Features and Customization
Once your Sony wireless earbuds are successfully connected to your device, you can delve into a world of advanced features that offer a personalized listening experience. Here’s how to unlock the full potential of your Sony earbuds:
1. Sony | Headphones Connect App:
Sony’s dedicated mobile app, Sony | Headphones Connect, is a powerful tool for customizing your earbuds’ performance. Download it from the App Store (iOS) or Google Play (Android). The app allows you-
- Sound Settings: Adjust EQ settings to match your preferred sound profile, whether you prefer bass-heavy tracks or crisp vocals.
- Ambient Sound Control: Enable Adaptive Sound Control to adjust noise cancellation levels based on your activity (e.g., walking, running, or sitting).
- 360 Reality Audio: For compatible models, this feature offers an immersive audio experience by recreating a live concert atmosphere.
2. Touchpad Controls:
Many Sony wireless earbuds have touch-sensitive controls. Use the app to customize these gestures to play/pause music, skip tracks, control volume, activate voice assistants, and more.
3. Quick Attention Mode:
Some Sony models include a quick attention mode that reduces the volume and lets ambient sound in when you need to have a conversation without removing your earbuds.
4. Wear Detection and Auto Play/Pause:
This smart feature automatically pauses your music when you remove one earbud and resumes playback when you put it back in.
5. Firmware Updates:
The app also serves as a platform for firmware updates, ensuring your earbuds stay up-to-date with the latest features and improvements.
6. Personalized Listening Experience:
For certain models, the app includes AI-based functions like DSEE HX (Digital Sound Enhancement Engine) which upscales compressed audio files for richer sound quality.
7. Battery Status Monitoring:
Monitor the battery status of your earbuds and charging case through the app, so you’re never caught off guard by low battery notifications.
In essence, exploring and utilizing these advanced features will not only enhance your overall audio enjoyment but also tailor your Sony wireless earbuds to suit your lifestyle and preferences. Continuously updating and personalizing your earbuds ensures that you always have the best possible listening experience.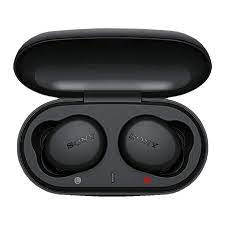
Conclusion
In conclusion, connecting Sony wireless earbuds to your devices is straightforward and allows you to enjoy high-quality audio on the go. With this guide, you’ll be able to effortlessly switch between devices, troubleshoot potential problems, and personalize your listening experience to suit your preferences. So go ahead, plug in those earbuds and immerse yourself in a world of crystal-clear sound!